GETTING STARTED


One of the challenges in Moodle development is finding a good starting point for creating a Moodle plug-in. I thought it would be cool to build a step-wise tutorial on the subject as I embark on a personal whim:

Building a Moodle Module that allows the Student to post their Moodle Forum posts to FaceBook, and elicits responses from their group of friends into a totally separate forum. Perhaps too ambitious for a first project, but it hits all of the major challenges.

I will start by coming up with a cool name for the plug-in. I am thinking of calling it InYourFace ?  This particular exercise will focus on building an activity module - a module that provides an activity that can be added to any Moodle course.

WHERE DO WE START?

NOTE: This tutorial assumes that you already have a working installation of Moodle 1.9.x available, and that you have at least one course installed in your Moodle instance.  It also assumes that you have some basic knowledge of PHP and MySQL.

Before we embark on writing our first Moodle module, let's download a template provided by the folks at Moodle.org. In our case, we will be writing our module for Moodle version 1.9.x:

Download Link for The Module Template for Moodle 1.9

We end up with a file called NEWMODULE.zip which we need to save to our local drive and unzip. In my case, I download to the Public folder, unzip the file and end up with .\Public\NEWMODULE.

NEXT ARTICLE IN SERIES

Wednesday, May 12, 2010

03MOD: Moodle Module Setup - Test Initial Changes to Template

TO START THE TUTORIAL FROM THE BEGINNING, CLICK HERE

So far...

We have modified the files in the module template, replacing any references to NEWMODULE with our module's name.

It is now time to make sure we didn't miss any of the changes:
  • We rename the directory that has been holding our files (NEWMODULE) to our module's name (inyourface).
  • We copy the entire contents of our module to our Moodle .\mod directory
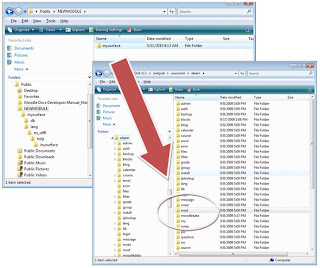

Click Image To Zoom


MOODLE NOTIFICATIONS

Now comes time for the dreaded Moodle Notification. After copying our module to the .\mod directory, log into the Moodle instance and navigate to the Administration menu, and . . .
  • Click on "Notifications"


Click Image To Zoom

We can verify the installation by navigating to Modules -> Activitiies -> Manage activities in the Moodle Site Administration menu:

If all of our changes were successful, we will see the following:
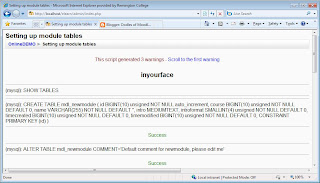

Click Image To Zoom


We can confirm that the module was installed correctly by navigating to Modules -> Activities -> Manage activities in the Moodle Site Administration menu:
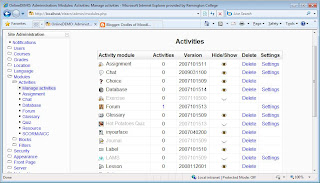

Click Image To Zoom

CONGRATS!

We now have a properly registered Moodle Module
that does absolutely nothing!
But we will change that soon :)

Next Article In Series

No comments:

Post a Comment